After 2+ Years, It's Finally Finished (kinda)
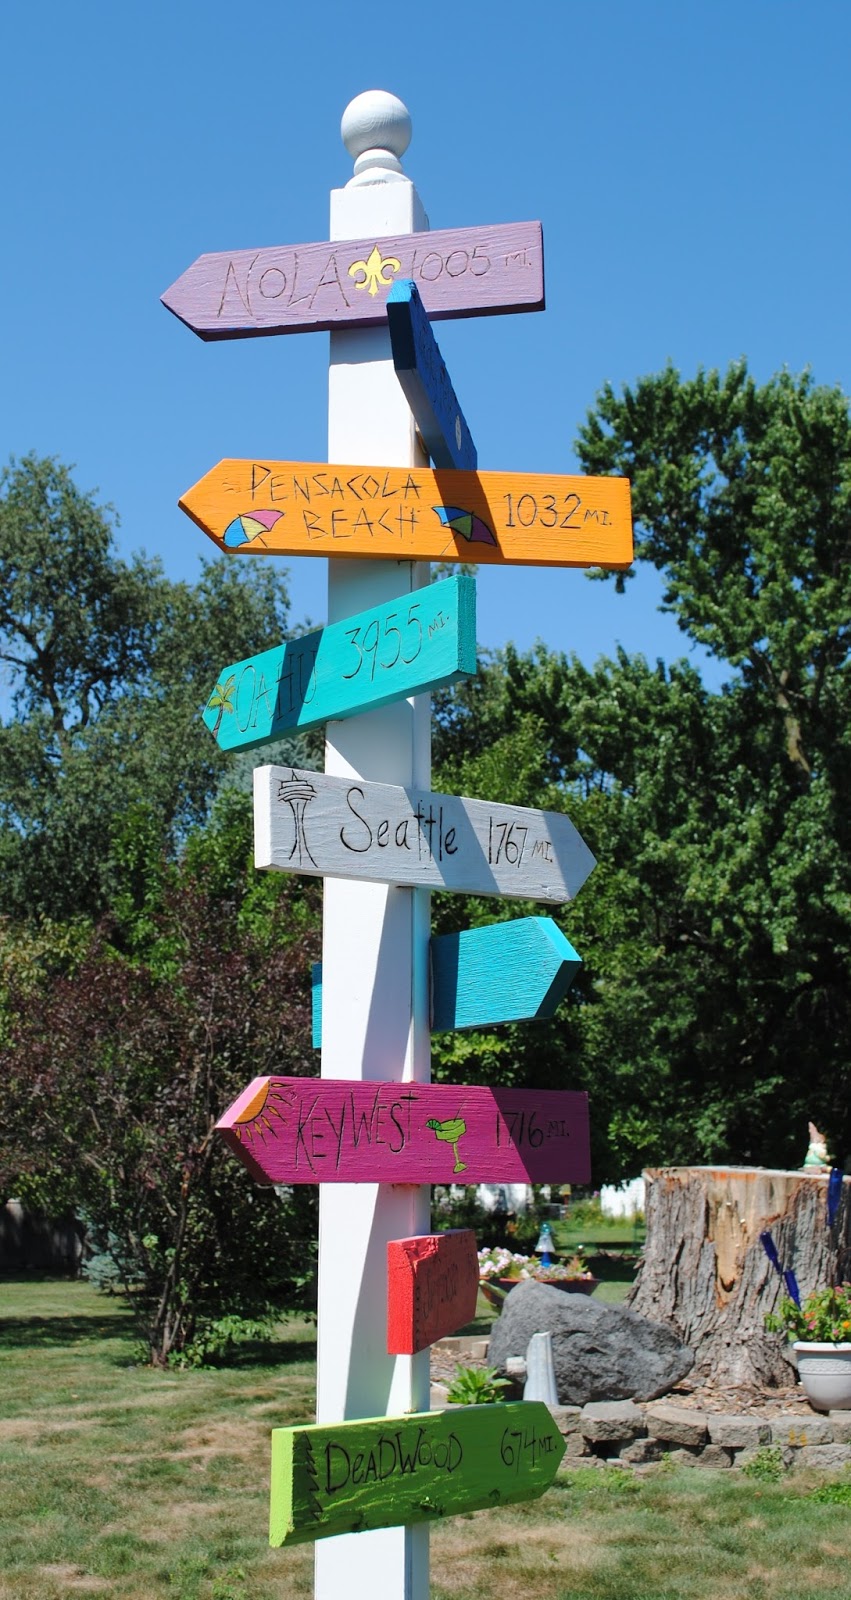
This sign post took over two years to complete (mostly because I'm easily distracted). I chose some of our best travel destinations, whether as a couple, with our family, or with good friends. It has room to add more, so I'd like to say it will never be completely finished--at least I hope I have lots of travel adventures yet to come!
Here's some more shots of it closer and from different angles:


My husband Tom cut the individual signs for me. Something I should be able to do myself, being a feminist and all, but he knows what he's doing, so why not let the professional do it, right?
Then I sketched letters and pictures on each sign. I tried to use a different lettering style on almost all of the places, and I didn't try to do them straight. I find if I intentionally make things crooked, it looks better than trying to do it perfect and not getting it that way.
I used my pencil letters just as a guide, as shown here. Then after I was done, I went back and erased the lines. If I couldn't come up with an appropriate picture for a sign, I looked at simple clip art photos for ideas. (Clip art was very helpful for a simple representation of the Seattle Space Needle.)

The distances I used were what Google Maps told me was the distance from each spot to my house. I still need to make several more: Las Vegas, Wisconsin Dells, and Disney World.
Here's a work-in-progress pic:

I used Dylusions paints exclusively on the signs, because they all match each other well, and I love the bright colors. I'm also a huge Dyan Reaveley fan (if you've read my previous posts, you know this already).
The post is from the local home improvement store. We added a finial, and spray painted it all white. I distressed the edges a little bit with sanding, but you can't see it on any of the pictures.

This post brace is what holds it in place. It looks a lot like those beach drink holders before you hammer it into the ground. or maybe the beach drink holders look like this thing. I'll do better landscaping around it later.

More help from the professional: Tom glued and nailed each sign up so they're super secure. He noted out corners of the post where the signs needed to be put up at an angle, which was most of them. This way there was more flat area to glue/nail them to. Here's a pic of him in action cutting a notch for the Seattle sign:

Once it was up, the whole thing was weather sealed very well. I'm not sure what kind of sealer we used, but it was in a spray can.
Another picture of the signs and post all put up. Now I just need to go on some more vacations so I can add more signs! Here's the view I enjoy from our backyard deck:
