
Wednesday, February 24, 2010
You Rock and Star Power Birthday Card
This card is made from the new You Rock paper pack and the stamp set Star Power. The colors are Outdoor Denim and Goldrush.


Tuesday, February 23, 2010
Veranda Birthday Cards
Both of these cards use the new Veranda B&T papers, and both are loosely based on patterns from the Originals CTMH cardmaking book.


This one uses the retired Lovely Daisy stamp set. The flowers and leaves were colored with a blending pen.

This flower is from the new So Sweet stamp set. The blue flowers were paper pieced.
Monday, February 22, 2010
Long Winter Scrapbook Layout

Just in case we don't remember this awful, horrible, nasty Iowa winter, I scrapbooked it. Most of the product used is CTMH. The colors are Outdoor Denim and Buttercup. The polka dot B&T paper is from the You Rock pack. Stamp sets used are Today's Date, Feathery Flakes, and Chocolate Alphabet.


They're kind of hard to see, but pearls are scattered about, and the snowflakes and dripping snow border are accented with diamond Stickles.
Thursday, February 18, 2010
Crumpled Paper Flowers
I've seen these paper flowers around on blogs for awhile and finally tried making a few:


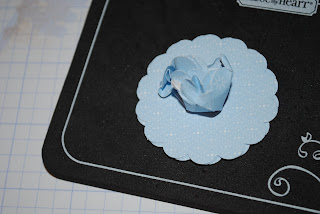


Start with a scallop circle punch--any size--and punch out five shapes.

Then pierce or punch a whole through your stack of shapes.

Insert a brad to hold the five shapes together. I used a tiny brad when I planned to cover it with a button and a large brad when the brad itself became the flower center.

Crumple separately every layer but the bottom one. The more "crumply" the better.

Unfold, add any center you want, and it's done.

To make the flowers look a little more shabby and add some depth, I ink distressed the papers both before and after crumpling. I used both newspaper and B&T papers. Very Easy! I made all three flowers in about fifteen minutes.
Tuesday, February 16, 2010

Monday, February 15, 2010

Sunday, February 14, 2010
Nursery Bash Birthday Card
(4th post today)

The cute giraffe is from the Nursery bash stamp set, and the sentiment is from the Piece of Cake set. The B&T paper is Animal Cookies.

Beautiful Things Masculine Birthday Card

The plaid paper is from the Back Country paper pack, and I used the stamp sets Beautiful Things (cat tails) and Piece of Cake (sentiment). The design is based, very loosely, on the card on page 57 of the CTMH Spring 2010 Idea Book.
Butterfly Kiss and Treasure Life Sympathy Cards


Sunday, January 24, 2010
New Orleans Scrapbook Pages with Felicity
Here is my first layout for my vacation scrapbook. I used the Felicity paper pack, which I think works great for the "feel" of New Orleans. I also used dimensional elements that I colored with ink, the Vintage Postcard stamp set, buttons, lots of pearls, and some nonCTMH flowers and punch.


Colfax PEO
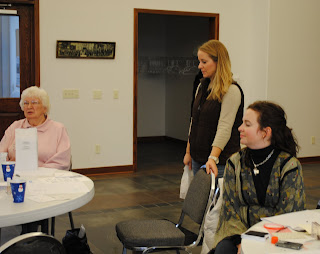
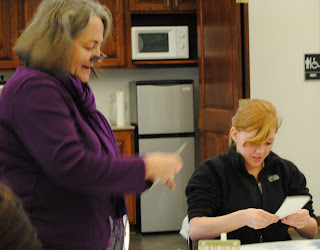
I had a fun day yesterday holding a fundraising card workshop with the Colfax PEO ladies. I hope they enjoyed it too... I believe they made a total of 120 cards. Pics:
My friend Mara who organized the event for me:

And more snapshots of the rest of the ladies hard at work:



My friend Mara who organized the event for me:


Wednesday, January 20, 2010
Family Ties Valentines


For these simple classroom Valentines, I stamped images from the "Family Ties - Children" stamp set on white cardstock, colored them with markers, cut them out, and attached them to a 3"x3" piece of Desert Sand cardstock. Then I stamped the February stamp from the "Today's Date" stamp set in black ink, in most cases overlapping from the Desert Sand cardstock on to the white. I used Tulip ink to stamp the hearts and tiny star (to mark the 14) from the "You're a Star" stamp set. Just add a "to & from" on the back and maybe attach a piece of candy, and you're set. TFL!

Tuesday, January 19, 2010
Sour Cream Container Valentines

Another idea for a classroom of valentines: Start with a 4" x 6" piece of paper. Bring the 4" ends together and adhere with good, strong adhesive to make a tube.

Glue one end of the tube closed.

Crimp the end shut. Crimping helps the end stay glued and makes it look more like a real sour cream container.

With one end still open, insert your candy, fortune, or other prize. Two or three candy kisses fit well.

Folding the tube the OPPOSITE way of the other closure, glue and crimp the container closed.

Lastly, decorate as little or much as you like. These are always a hit, and they're cheap and easy to make. The only drawback is that the containers are ruined when torn to get the treat out.
Monday, January 18, 2010
Luggage Tags
(Second Post Today--scroll down for Matchbook Valentines)

Not only is this luggage tag fast and easy, but it's cheap too. Just use a baseball card protector sleeve (available everywhere they sell baseball cards or other collectible cards) and a ring (available in office supply stores and in most discount stores in the office supply aisle). Cut cardstock to fit in the sleeve, decorate any way you choose with B&T papers, punches, stamps and anything else flat, and insert in the sleeve. (You can decorate both sides, or put a business card or label on the back for identification. Punch a hole and attach the ring. Decorate with ribbon(s), and you're finished. These are great for luggage, scrapbook bags, computer bags, backpacks, kids' sports bags, etc.


Subscribe to:
Posts (Atom)