Welcome to My Blog!
Hi! Thanks for visiting! If you have a blog or other favorite website you'd like me to check out, let me know! And, please, comment on my posts--I'd like to hear from you.
--Ms. Molly
--Ms. Molly
Sunday, January 24, 2010
New Orleans Scrapbook Pages with Felicity
Here is my first layout for my vacation scrapbook. I used the Felicity paper pack, which I think works great for the "feel" of New Orleans. I also used dimensional elements that I colored with ink, the Vintage Postcard stamp set, buttons, lots of pearls, and some nonCTMH flowers and punch.
Colfax PEO
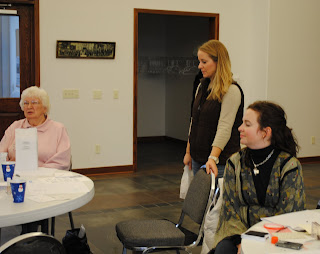
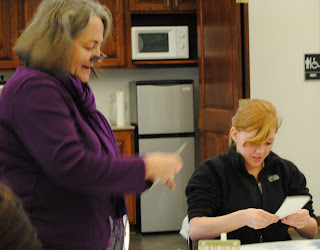
I had a fun day yesterday holding a fundraising card workshop with the Colfax PEO ladies. I hope they enjoyed it too... I believe they made a total of 120 cards. Pics:
My friend Mara who organized the event for me:
And more snapshots of the rest of the ladies hard at work:
My friend Mara who organized the event for me:
And more snapshots of the rest of the ladies hard at work:
Wednesday, January 20, 2010
Family Ties Valentines
For these simple classroom Valentines, I stamped images from the "Family Ties - Children" stamp set on white cardstock, colored them with markers, cut them out, and attached them to a 3"x3" piece of Desert Sand cardstock. Then I stamped the February stamp from the "Today's Date" stamp set in black ink, in most cases overlapping from the Desert Sand cardstock on to the white. I used Tulip ink to stamp the hearts and tiny star (to mark the 14) from the "You're a Star" stamp set. Just add a "to & from" on the back and maybe attach a piece of candy, and you're set. TFL!
Tuesday, January 19, 2010
Sour Cream Container Valentines
Another idea for a classroom of valentines: Start with a 4" x 6" piece of paper. Bring the 4" ends together and adhere with good, strong adhesive to make a tube.
Glue one end of the tube closed.
Crimp the end shut. Crimping helps the end stay glued and makes it look more like a real sour cream container.
With one end still open, insert your candy, fortune, or other prize. Two or three candy kisses fit well.
Folding the tube the OPPOSITE way of the other closure, glue and crimp the container closed.
Lastly, decorate as little or much as you like. These are always a hit, and they're cheap and easy to make. The only drawback is that the containers are ruined when torn to get the treat out.
Monday, January 18, 2010
Luggage Tags
(Second Post Today--scroll down for Matchbook Valentines)Not only is this luggage tag fast and easy, but it's cheap too. Just use a baseball card protector sleeve (available everywhere they sell baseball cards or other collectible cards) and a ring (available in office supply stores and in most discount stores in the office supply aisle). Cut cardstock to fit in the sleeve, decorate any way you choose with B&T papers, punches, stamps and anything else flat, and insert in the sleeve. (You can decorate both sides, or put a business card or label on the back for identification. Punch a hole and attach the ring. Decorate with ribbon(s), and you're finished. These are great for luggage, scrapbook bags, computer bags, backpacks, kids' sports bags, etc.
Matchbook Valentines
Less than a month until Valentine's Day! If you're making a whole classroom's worth of children's valentines, it's time to get started. Here's an easy pattern for a matchbook valentine.
Cut a piece of cardstock 5 3/8" x 1 3/4". Score at 1 3/4", 2 1/4", and 4 1/2".Fold in at all the score lines and staple near the bottom of the matchbook. Decorate with punches, stamps, pearls, etc. Insert a small treat in the matchbook with a glue dot (individually wrapped Lifesavers work great).
Sunday, January 17, 2010
"Vintage" Valentines
(Second Post Today)
I made these four Valentines using pieces of antique valentines that were no longer worth anything due to their poor condition. I used bits and pieces of embellishments, and the stamped sentiments are from the January Stamp of the Month "True Friends." I love recycling vintage valentines and postcards into new cards, and I'm lucky my mother is an antique dealer who gives me all the damaged, unsellable paper goods I can use. [If you have antique postcards, valentines, magazines, blotters, etc. you want to sell, contact me, my mom just might buy them from you.]
I made these four Valentines using pieces of antique valentines that were no longer worth anything due to their poor condition. I used bits and pieces of embellishments, and the stamped sentiments are from the January Stamp of the Month "True Friends." I love recycling vintage valentines and postcards into new cards, and I'm lucky my mother is an antique dealer who gives me all the damaged, unsellable paper goods I can use. [If you have antique postcards, valentines, magazines, blotters, etc. you want to sell, contact me, my mom just might buy them from you.]
Piece of Cake Birthday Cards
I'm home from vacation and back in my studio. Notice my new blog background? I found a pink one for Valentine's Day, but there are also fleur de lis in it too--reminiscent of my trip and upcoming Mardi Gras. Anyway, here are two cards I made when I got home for a card workshop next weekend. Both cards contain exactly the same supplies. The stampset is "Piece of Cake," the February Stamp of the Month. The stamps are colored with CTMH Watercolor Pencils. The papers are Animal Cookies. TFL!
Tuesday, January 12, 2010
Rawls Road
The only thing more surprising than seeing this sign was Tom stopping the car for us to get a picture.
Monday, January 11, 2010
Orange Beach
Lots of scrapbooking to do when I get back...
The beach outside our hotel.
Neal & Jess collecting shells.
Jess's sandcastle.
Lunch at Lambert's Cafe.
Neal and Jess just before being consumed by a huge land shark.
Tuesday, January 5, 2010
Sunday, January 3, 2010
Studio Tour
I cleaned my studio (formerly my "craft room" until Tom started calling it my "crap room") today, and I decided to take some pics for my other blog, but I thought I'd post more here. The first pic was taken from the far wall looking toward the door (obviously). I have a counter along one wall to stand at, which has four rolling carts underneath that hold all my punches, embossing tools, Bind-It All stuff, circle cutters and decorative scissors, and card bases and envelopes. The two long tables are from Menards, which were purchased so I could hold workshops, but I always spread out all my projects over them too. There are four pink chairs (from Staples) and then four more nice folding chairs, so I can sit eight people comfortably.
A close up of the cube shelves, which are from Target, along with the bins. I keep all my design books here, and hide old Idea Books and other unsightly stuff in the bins. The "Life is Good" is from Stampin' Up.
The same side of the room taken from the other side. I keep a couple mats, my light box, my Scor-Pal, and my big paper cutter out on the tables when I'm not hosting a workshop.
A close up of my bookshelf. I keep ribbon in a tangled mess in the large pink bin. The second shelf has all my Cuttlebug supplies and a few albums on it. The next shelf is magazines and some cards I've made. The fourth shelf is misc. notebooks and containers of antique postcards. The bottom shelf has my Xyron (when is the last time I used that?!) and a cute box with contents unknown to me at the moment.
My stamping corner. We got the large bulletin board at Menards, and I pin up binder clips to hold my artwork. It's usually full, but I just took down all the Christmas cards. My stamps are in the bookcase, and all my ink and lots of embellishments are in the wall unit. My Ott light is there, but it usually moves around to wherever I am. The pink bins on the counter are my "must haves"--my adhesives, sponges, favorite scissors, and other tools I keep out so they're handy.
At the left end of my counter is a plastic set of drawers that contains more embellishments, rub-ons, etc. Tucked in beside it is my marker tower. All my paper is to the left. The cardstock is all in the Cropper Hopper storage, but the B&T paper is pretty unorganized.
And lastly, here's a look at how my studio looked before I tidied up. Horrible! I hadn't completely cleaned up from my last workshop, had made several projects before and after Christmas, had been designing some workshop projects, and then I went to a crop New Year's Day and dumped the stuff in the room when I got home.
Thanks for taking my studio tour!
Saturday, January 2, 2010
Springtime Card
This rainy day card was made mostly from the new CTMH stamp set Springtime. It's based on Beth Atma's "Rain Boots" card from the Dec/Jan issue of The Stampers' Sampler, although she used a different stamp set. The colors are Holiday Red, Twilight, Sweet Leaf, and Sunflower. I used a lot of Liquid Glass to make everything look shiny and wet. The puddles are from the Makin' Waves stamp set. The B&T papers are from the Emporium paper collection.
Bunny Love and Treasure Life Card
I made this card for a CTMH consultant artwork challenge to use the colors Cocoa, Topiary, Watermelon, Indian Corn Blue, and Buttercup. It makes me think of spring while suffering Iowa's subzero temperatures. The stamp sets are Bunny Love and Treasure Life. There's a small pearl for the flower center on the bunny's hat, and the white mat was embossed with my Cuttlebug. The circle image and mat are raised, and all the edges are distressed. 

Friday, January 1, 2010
Veranda and Just Because Birthday Card
For this birthday card I used CTMH's new Veranda papers and the Just Because and Fringed Phrases stamp sets. The fleur de lis edge punch is fron EK Success. They are hard to see in the photo, but there are pink "gems" on the clasp of the lady's purse and on her hat.
Childhood Portrait and Tickled Pink Birthday Card
Again, I used the Tickled Pink papers, but this time with the little ballerina fromn the Childhood Portrait stamp set and "Happy Birthday" from the Fringed Phrases set.
Subscribe to:
Comments (Atom)


