Welcome to My Blog!

Hi! Thanks for visiting! If you have a blog or other favorite website you'd like me to check out, let me know! And, please, comment on my posts--I'd like to hear from you.
--Ms. Molly


Showing posts with label Creative University. Show all posts

Wednesday, February 12, 2014

Creative University 2012 Layout

In February of 2012 I was fortunate to attend Tresa Black's Creative University art retreat near Coeur d'Alene, Idaho.  I took lots of pictures and, of course, have only scrapbooked I think three layouts.  A few weeks ago I was in the mood to scrapbook, and made this two-page layout of only the beautiful views from the long weekend:
 

This is a poor picture, but you can see I used plain CTMH outdoor denim cs with just a band of B&T paper and some slate cs.
I used a mat on just the larger 5x7 photo on this page.  I added glittery letters and lots of bling and white embellishments.
 
The long border of bling on this page is from Recollections.
 
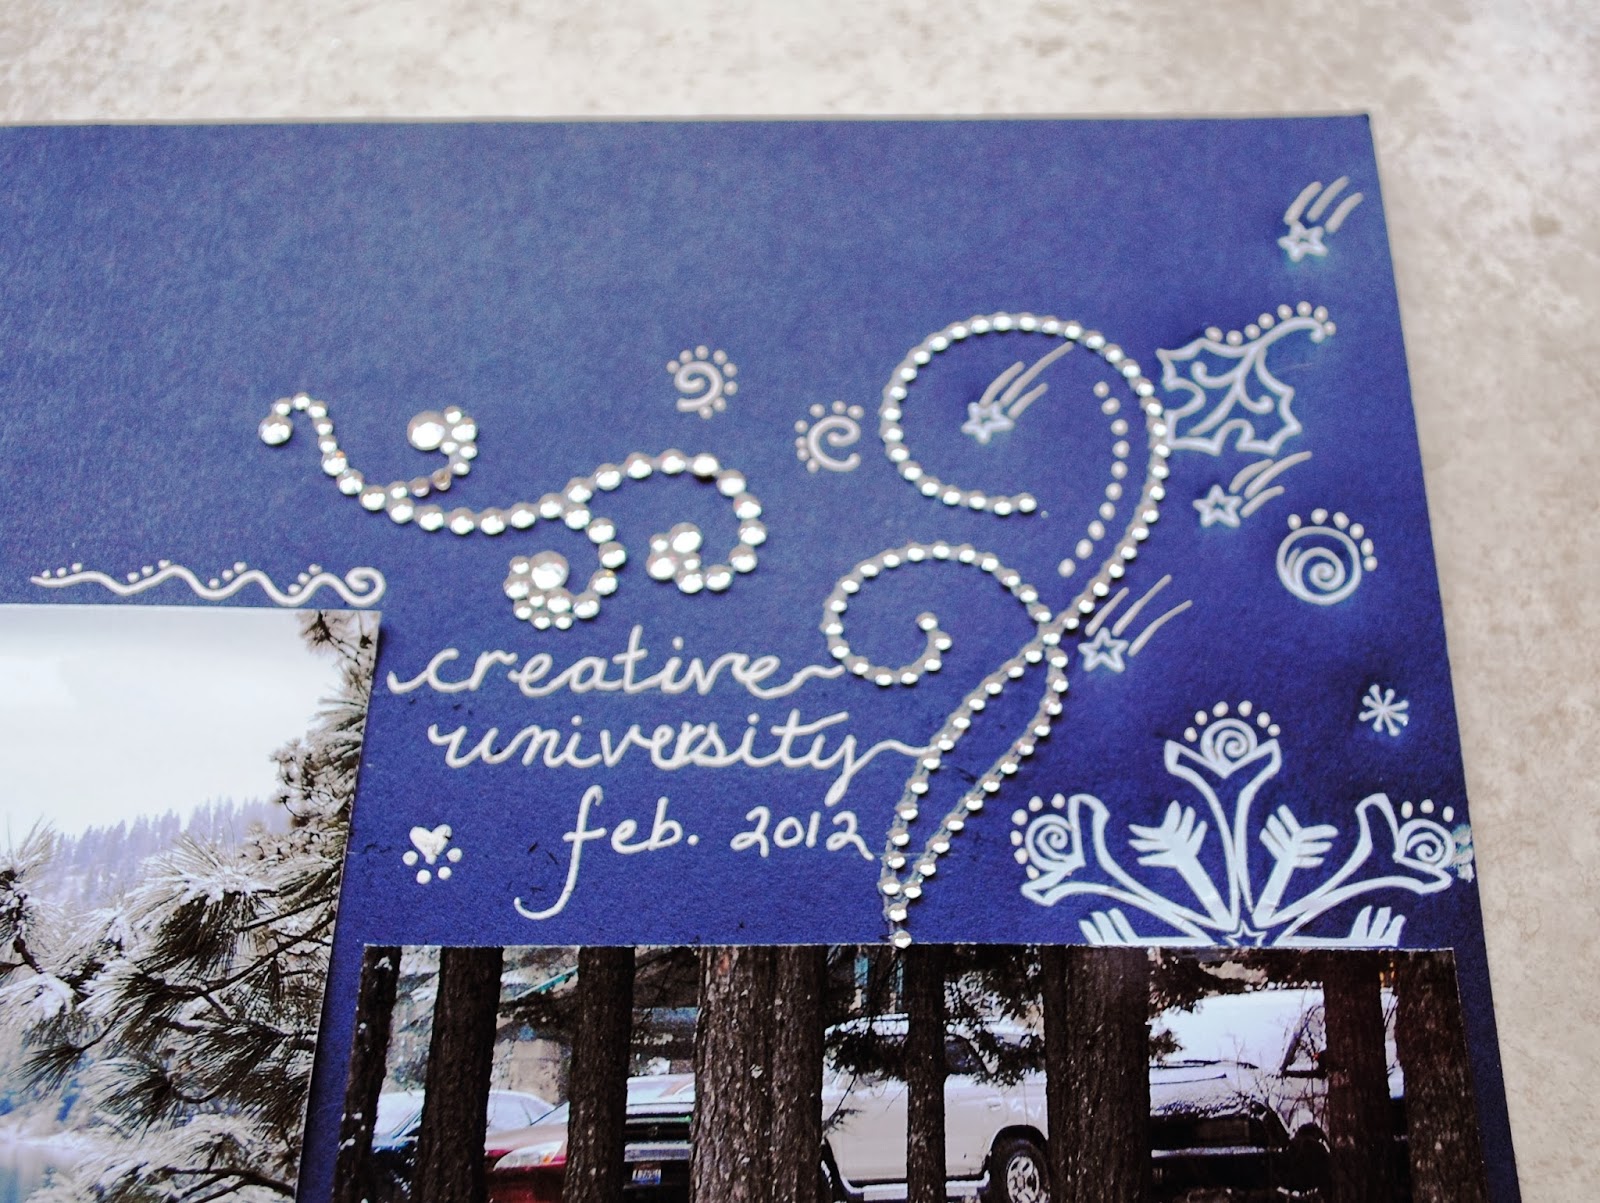
Here's a close-up of the white and silver embellishments.  I used some bling swirls, some single rhinestones, some rub-ons, and I doodled with my white pen.  Of course, since I was writing directly on my layout, I misspelled "university" and had to squeeze the "r" in after I noticed it.  Ugh.
 
Finally, here's a look at the embellishments and doodling on the other page.
 
I believe Creative University is happening right now, and I wish I was there.  If you haven't been to Tresa Black's blog, check it out: Fabulously Artsy
 

Monday, August 13, 2012

Collage Tag

I finally experimented with some of the Lindy's Stamp Gang products I bought after playing with them at Tresa Black's Creative University last winter.  After stamping the background of this tag with a newsprint stamp, I sprayed it with Tiffany's Blue Starburst Spray & Van Dyke Sepia Shadow Mist.  You can't see it from the photo, but the background has a very shimmery look.  I painted the butterflies with some Yasutomo iridescent watercolor paint.  The bright blue centers of the flowers and the highlights on the butterflies are Lindy's Stamp Gang Tiffany Blue Magicals powder.  This was my first attempt at this type of collage art, and I can see how easy it can become addictive.


Tuesday, July 31, 2012

Butterfly Charms

I'm still here!  My blogging has been poor at best lately, but I'm still crafting--mostly doing a little commission project that I'll share soon.  In the meantime, here's a project I just remembered I hadn't posted yet.
Last winter when I went to Creative University in Idaho, I signed up for the charm swap,  Having never done ANY jewelry crafts of any kind, I was stressed.  Pretty silly to get stressed over something like this when life is full of real problems, but that's just me.  Anyway, the theme was "Woodland Fairies" and you could use anything that fit the theme.   The only "don't" was silver color or metals.
I came up with this butterfly charm for my art charm, which I showed on an earlier post, but here's the step-by-step how to:
I used plain wooden disks, about the size of a quarter.  I sponged theme with green, purple, and a little turquoise inks.
Next, I stamped a butterfly from CTMH's stamp set "Butterfly Kiss" on each charm.  I like that the image runs off the edge a little bit.
I edged the charms with this Krylon gold leaf marker.  It covered so well, with only one coat, and the edges were perfect.  It gave the charms a very finished look.
I used my Crop-a-Dile to punch a hole right through the wood charm--no drilling!  I do need to mention that you need to make sure your image is positioned the same way on both sides of the charm.  I didn't do this with my first batch, and many of my butterflies were upside down or sideways on one side.  I kept them all, and I'll use them sometime because all together they look like butterflies in flight, but for these charms that were given out singularly, I needed them to all be right side up.
Lastly, I sealed my charms with gold shimmer Modge Podge.  It's hard to tell from the photo, but the charms have a slight gold glittery shimmer.
Here are the finished charms.  I think they turned out pretty well for a first-time charm-maker.
I tied the charm (along with a filler charm we had to create too) on to a piece of cardstock and added my name and contact info.
I used this picture for the reverse side.  I found it on an antique postcard.  I thought she looked a little like a woodland fairy.
And here's a last picture of all my charms packaged and ready to trade.

Thursday, February 23, 2012

A CU Inspired Card with Footloose

I've been home sick for a couple days with bronchitis--yuck.  (CU'ers:  The cold I had in Idaho turned worse after I got home--I hope I didn't infect any of you!)  I've also been frantic to get to my studio to do some crafting since returning from CU.  Unfortunately I can't craft and lay on the couch at the same time, and the couch has won.  But, my good friend Cheryl was hospitalized last weekend, and I have to make her a card, especially because they wouldn't have wanted me to show up at the hospital in my state.  Definitely calling upon ideas I took away from CU, here's what I came up with:
I love the Footloose papers and colors.  I used them for the first time at CU in Sheila's class.  The little flowers, flourishes, bling, & general layout look a little like Michelle L.'s tin.  And Joy, although she wasn't a CU instructor, inspired me to get out my Cricut (along with all the other women who were easily cutting out shape after shape at CU).  All the Cricut shapes (the labels, the flourish, & the butterflies) were cut from the CTMH Art Philosophy cartridge.  And, what did Michelle N., inspire me to do?--this one will be obvious:

I added a pop-up to the inside of the card!
Pin It

Wednesday, February 22, 2012

Creative University - Part 3

The Charm Swap

Aside from a few yarn and macaroni necklaces, CU's charm swap was my FIRST ever experience making jewelry.  I stressed about it from the day I signed up for the swap.  Erin Grotegut organized the swap.  Erin is a very talented artist.  She also taught our CU jewelry class.  Her blog, Inky Smiles, is HERE.  The swap rules were to create an art charm and a filler charm within the theme "woodland fairy" and use no silver, only gold, bronze, & copper metals.  We had to make ten of each style charm--one to keep and nine to swap with other CU attendees.  I made a few extra, so I swapped a couple more after the organized swap.

Here was my offering to the charm swap.  My art charm was basically a wooden disc with stamping and Modge Podge.  I'll post instructions here soon.
And here are the other creative ladies' charms.  When available, I've linked their blogs with their names so you can check out their other fabulous artwork.
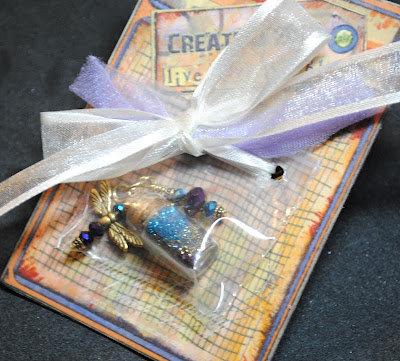
This is from our charm swap leader, Erin Grotegut. Awesome!  There's a tiny little dry dandelion inside the bottle to make a wish on...I think I wish I had as much talent as Erin.


This charm was made by Tahne T.  It's a cute little wooden door.  I'm pretty sure a gnome would live inside there.  Tahne taught us the chain mail bracelet on my last CU post.

This set was made by Diane K.--a beautiful little fairy in the frame plus an owl filler charm.  I love the colors and the art nouveau feel.

I swapped twice with Linda S. and got these two sets.  Look how creative she was to make that toad stool on the far right with two beads.  Linda sat behind me in the cropping room--she's a sweetheart, even when she's tiring of making angry bird cards.

These two charms were made by Melody P.  Her charms match her background so well I don't want to detach them!  Melody also has a cupcake business and brought along some very tasty cupcakes to share at CU.  And, when I forgot one of my bags at CU, Melody was kind enough to deliver it to me in Spokane.  Thanks again, Melody!
Tamara W. made this set.  It's a little hard to see in the pic, but the colors are also awesome.  The little tag from the fairy charm says "believe."  Tamara was one of us "downstairs" gals, and I really enjoyed her and her sidekick, Kim.
Nichole L. is the artist behind these charms.  I love the fairy dust!  And her base card is adorable too.  I'm glad I took pictures of them all before disassembling them.  Nichole took hundreds of pictures at CU.  I can't wait to see them.  I peeked at some of her projects on her table, and they were amazing.
This very creative charm was made by my good friend who I've known since the 3rd grade, Robin G.  She was worried it wouldn't be good enough.  Ha!  It's adorable, and she made it from a real puzzle piece.  Robin helped me a lot with my charms and taught me how to wrap the ends of the head pins to get me started.
Another example where the photo doesn't do the charm OR the card justice.  This set was by Lisa S.  I enjoyed meeting Lisa and her mom, Linda.  Both are very talented women.  When I got home one of the first things I did was order some of the watercolor paints Lisa was using at CU.

This cute dragonfly and "believe" charm is from Darlys R..  The photo is a little blurry, but her charms and card are beautiful. I'm absolutely in love with the dragonfly. 

Both of these charms are pretty enough to be the art charm of the set.  Bobie G. is the artist.  She used resin for the charm on the right, which I'm too scared of to use.  Hanging off the top of the left charm is a little acorn.  Too cute!

Lastly, here is the set by Lisa T.  How creative that Lisa made a fairy wand?  And her blue fairy charm on the left is gorgeous.

Those are only the charms I got.  There were many, many more involved in the swap.  I'm not sure yet if I'm going to make a bracelet or several necklaces.  For now, I might hang them up in my studio, still on the cards, so I can admire them.

Here are a few more pictures from CU:

Traveling buddies:  Jeannie W., Molly, & Robin G.

Melody getting a flower painted on her arm by Tresa Black.

Traci & Olya

Robin & Joy

What an amazing weekend!

Creative University - Part 2


Lake Coeur d'Alene at Camp Lutherhaven.

Did I mention in my earlier post how beautiful the area was?

Seven of the twenty technique examples from the "Technique Boutique"
One of the creative classes was a "technique boutique" where we were given the opportunity to make twenty 3x3 cards, all showcasing a different stamping technique.  These are my favorites:
Starting at the upper left, is a faux silk technique using tissue paper, a resist, dyed ribbon, a stencil, a reflection using transparency, painting with Lindy's spray, and white ink on black cs.  These are just my favorites.  I was soooo tired that evening that I didn't complete all twenty cards.  Instead I just cherry-picked my favorites.  All the examples were outstanding though, and I wish now I had done them all.  Some of my favorites were the ones using the Lindy's Stamp Gang products, which I had never tried before.


Here's a shot of some of the "loot" I brought home.  Gifts from Tresa, secret sister gifts, roommate gifts, etc.  Cards, stamps, treat holders, supplies & tools--and this photo doesn't even show all the candy and other treats, which I'd already moved to a bowl in my kitchen.  There's some amazing artwork here:  sewing, stamping, Cricut crafts, and jewelry making.

I gave away a few things too.  Here are some examples of my offerings, which I've been wanting to post, but had to wait until after CU:
  
secret sister gift


Secret Sister Gift


Secret Sister Gift

Roommate Gifts

The surprises inside the owl gift bags.

There was so much gift giving and sharing it was almost like Christmas.  Thank you so much to my secret sister, Kristen, and my roommates Robin, Theresa, Tammy, and Rachel for all the fun presents.

Another little extra was an impromptu lesson by Tahne T. on how to make this bracelet.  She brought all the needed supplies, and several of us made them.  I love it!, but dang that was a lot of jump rings to open and close.
The picture is dark, but the jump rings are linked together all around a strand of blue glass beads.  It's very beach-like, and I plan to wear it two weeks from now when we visit the gulf coast.

Here's a pic of me with my roommates outside our cabin.  We were the "Lil' Otters."
Lil' Otters
Another fun person I got to know was Joy.  Here's a picture of us.  I took it in front of that wall hanging in the dining hall so I wouldn't forget her name...lol


Molly & Joy
Joy is the co-author of the blog "Everyday Cricut" which is huge in the world of Cricut users.  Provo Craft sends Joy and her friend Melanie cartridges before they are released, so they can create projects and blog about them, thus enticing the rest of us to buy.  It's not hard to be enticed by her projects.  She is an absolute wizard with the Cricut and just may have motivated me to get mine out and use it.  To check out the Everyday Cricut blog, go HERE.  Joy's personal blog, Obsessed with Scrapbooking, can be found HERE.  I just checked it, and Joy blgged about me.  A cyberspace full circle I guess.

I met so many nice and talented women at CU.  It was inspring to be around all that talent.  I came home with many new friends and gobs of creative ideas.  I have one more post for later--the Charm Swap.


Tuesday, February 21, 2012

Creative University - Part 1


Robin G., Tresa Black, & I during Creative University
 Last Thursday through Sunday was Creative University, or Create U, or simply CU.  CU is the brainchild of artist and crafter Tresa Black.  Tresa is a fellow CTMH consultant, a member of the Lindy Stamp Gang design team, and an overall amazing artist.  I've been inspired by her website, Fabulously Artsy for quite a while.

Instead of just stalking Tresa online, my friend Robin & I decided to attend CU this year, something we've wanted to do for years.  This was Tresa's fifth annual CU.  She holds it at Camp Lutherhaven near Coeur d'Alene, Idaho--not a short trip from Iowa.
 
View of Lake Coeur d'Alene from CU.


The views at Camp Lutherhaven were spectacular!  It snowed a couple times, but not enough to cause problems, and the snow on the pine trees made for some great photos, of course to be scrapbooked later.  Whether we were in a class, hanging out in our crop area, or having a meal in the dining hall, the windows faced the gorgeous woods, lake, and mountains.  Sixty women attended, all scrapbookers, so there were more than a few pictures taken.


Creative Classes:
Card Cafe projects designed by Sheila Bennett

 Sheila Bennett designed and taught the class for these four cards.  Sheila's blog can be found HERE

These four birthday cards all showcased diferent techniques.  My favorite is the whale, which used CTMH's new "Footloose" papers and the "Under the Sea" stamp.

(Oops--the card on the bottom left was upside down when I took the picture!)


Layout designed by Michelle Nist.
Michelle Nist taught the scrapbooking class where we made this layout using CTMH's "Lucy" papers and the "Princess Wings" stamp set.  

Michelle's blog can be found HERE.
The flip-flap on the upper left of the left page of the layout opens to reveal a pop-up butterfly--too cool!


Except for preparing for the CU charm swap, which I'll show pictures of later, I had never made any jewelery until this awesome "Bird on a Wire" bracelet.  This bracelet was designed and taught by Erin Grotegut.  Go to Erin's blog HERE.  I love this bracelet!  I was completely out of my comfort zone, but it turned out great.  I still can't believe I made it.


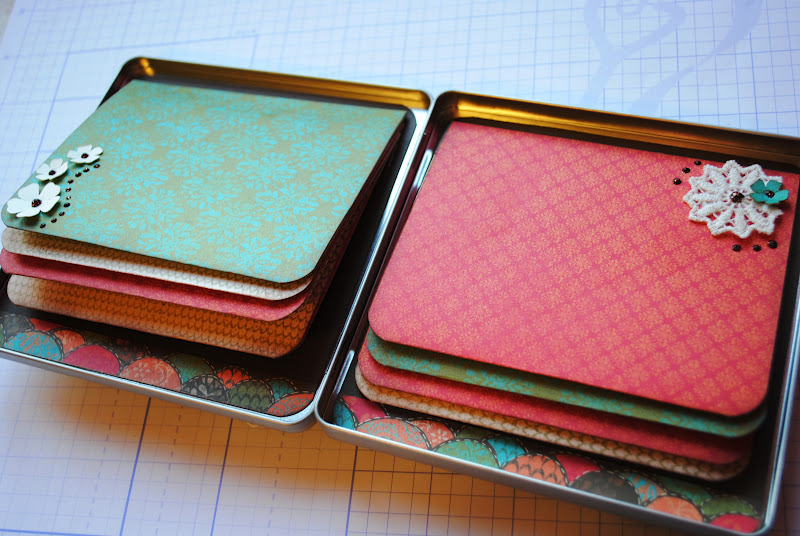
This project was an altered cd tin. It was designed and taught by Michelle Johns.  Michelle's blog is HERE.  The project used papers from CTMH's "Stella" papers and incorporated some three dimensional flowers cut from the Cricut with CTMH's Art Philosophy cartridge.  I think it's beautiful.  I want to make some similar ones if I can find the cd cases.


The inside of the tin is full of flaps ready for photos.
A long post, and I'm not even done.  More info on CU to follow.