Welcome to My Blog!

Hi! Thanks for visiting! If you have a blog or other favorite website you'd like me to check out, let me know! And, please, comment on my posts--I'd like to hear from you.
--Ms. Molly


Showing posts with label Carta Bella. Show all posts

Wednesday, September 9, 2020

Toy Story Mania

A 3D Target Ride


Toy Story Mania at Disney Studios was one of those rides at Disney World we all could enjoy: The theming was excellent on top of being a 3D ride, it had shooting the kids could do, and the points added up for the competitive adults.
I used some of my Echo Park "Magical Adventure" paper and a lot of Carta Bella "Toy Box" paper. The picture of Buzz & Woody running with some army men in the queue is an extra from the Photo Pass CD we purchased. The page is pretty chaotic, but so was the ride, and I think it works well.

Thanks for visiting my blog!
--Ms. Molly


Monday, July 20, 2020

More Vacation Layouts

"Cozy Cone Motel" Pool

Inside Disney World, inside the Art of Animation Resort, inside Radiator Springs, sits the imaginary Cozy Cone Motel and its pool. The cabanas are extra-large traffic cones, and it's a quieter, small pool than the Big Blue Pool.


Keeping with the "motel" style, I used Echo Park's "Summer Splash" vintage-themed papers.


I added some white and blue paper strips around the photos to highlight them.


I glued down the wash line of swim wear, but I used dimensional adhesive along the longer items, so it looks more like the items are blowing in the breeze.  The title is done with Thickers.


I like all the motel ads in the Summer Splash papers. They fit pefectly with the Cozy Cone sign. I added a few Nuvo drops and journaled in two different colors for a little interest.

Thanks for looking!
--Ms. Molly


Monday, July 6, 2020

Pool Layout

Back to Disney World Layouts:


We were so busy we didn't swim too much on vacation, but the kids loved the Finding Nemo themed Big Blue Pool, at the Art of Animation Resort.

This is a simple layout with bright colors. It seems a little brighter in person too. I used two papers from the "Best of Heidi Swapp" paper pack (an awesome 180-pages of  paper that I will be using more of soon) and a piece of blue cs for the base.
"Pool" and "pools rule" both come from the Carta Bella "Summer Splash" collection. The clear "gems" near the word pool are Nuvo Crystal Gems. The frame is from my old CTMH stash, the rainbow sticker is from Amy Tangerine, and the heart, star, and circle stickers are enamel dots from Shimelle box of crayons. 

I received the Nuvo Crystal Gems, the Amy Tangerine stickers (a lot of them), and the Shimelle enamel dots as part of a monthly card kit from the Simon Says Card Kit. A shout out to this card kit. It is a monthly subscription, but if you don't pay in advance, you don't get anything, and you can see what the monthly kit is before you decide to order. I really like it, and I've received a lot of new products to try in the kits. There are a lot of monthly subscriptions out there, and I definitely give this one a thumbs up.

Thank you for stopping by my blog!
--Ms. Molly

Wednesday, January 22, 2020

Disney Junk Journal / Travel Journal (Post 4)

Journaling our 2019 Family Trip to Disney World

(View the first post; View the second post; View the third post.)


More of our family's trip and journal:


These fun, eclectic pages please me for unknown reasons. Maybe it's the cute picture of Finn on the bottom right with the journaling that his favorite park was "All of them" or maybe it's Shae asleep on the ottoman at the top of the left page.  The left page's view finder area, flips up:


It reveals more random pictures.

The abstract Mickey Mouse on the right side is another postcard we received from Disney before the trip. This time I completely covered the back with B&T paper.


Both of these pages are pictures from Disney buses.

Of course, we had to spend some time at the resort pools:


Usually by the time we took a break from the parks, we were all pretty tired, but we got to the pools a few times, and the kids loved it. The chipboard embellishments are from Carta Bella "Summer Splash."

The next page is all from Animal Kingdom.


No fancy stuff on this page either--only one little top-fold journaling spot at the bottom left. Otherwise just photos and journaling.


We're not foodies by any means, so we didn't want to spend a lot of time and money for restaurant experiences. We did go to the Sci Fi Theater for lunch one day. We'd been there years ago and liked it. Now, I don't recommend it. It was so dark we couldn't see our food at all. The kids' favorite part was the light-up cups they received with their milkshakes. The sparkly paper on the right is a pocket:


A couple more pictures (front and back) and one of the kid's "driver's license" is tucked in the pocket.

We were very excited for the next area:


Galaxy's Edge (the Star Wars area of Hollywood Studios) opened up about a week before our trip. It was crowded, but not too bad. The newest ride, "Rise of the Resistance," wasn't open yet, and we were luck to get only about a 45-minute wait for "Smuggler's Run." The left side is just pictures from the area and the ride, and the right is the area's park guide. It's affixed to the back of one of the postcards Disney sent us.  Here's the guide unfolded:


Darth Vader is on the front of the postcard. I added a little star charm on a string to the postcard


The top right photo and the journaling is about Finn building his droid.

More miscellaneous pics on the next page:


The next "busy" pages are all Toy Story Land and Toy Story characters: 


The two black tags have more pics, front and back:


And, there's a little journaling card on the bottom right behind the monkeys. 

The next page has the Disney photo from Pirates of the Caribbean:


The right side is a half page, cut with a waved edge using the Dylusions ruler as a guide.  It's easier to see from the other side:


The right Pooh-themed page has a band with a tag:


Shae was the PERFECT age for the Pooh-themed areas and loved meeting the 100-acre wood characters.

The next pages are darker, with pictures from the Tower of Terror and the Haunted Mansion.


I made the background with white and grey paint and added the argyle decisions with a stamp.

Back to colorful on the next pages:


My grandkids LOVE rainbows, so the pics are all rainbow related. The Mickey buttons are from my stash. The striped B&T paper makes a great place to add journaling.

Thanks for checking out this journal. I hope you look at the other posts in this series too.  It's gotten pretty long. Maybe 2 posts left?

Cheers,
Ms. Molly


Wednesday, March 27, 2019

You Can Never Have Too Much Beach Time

Another Carta Bella Beach Layout


I love this layout of my grandkids in the Gulf of Mexico. Neither one was very fond of getting much more than their feet wet after they felt the tug of the waves, but they sure enjoyed the beach time.

This layout uses the Carta Bella "Summer Splash" collection, and I added the Recollections flowers, Nuvo Drops, and a starfish from Jolee's Boutique. The background paper is from Bazzill.

I can't say enough about how much I love the Summer Splash Line. My last four layouts were made with it.  Click back to my last three posts to view the other layouts.

Sunday, March 24, 2019

Family Beach Layout

My daughter's family at the beach

This layout is of my daughter Jess's family at the Gulf Coast last fall. This was Finn & Shae's first trip to a beach, and it was a success, despite Hurricane Gordon coming on land while we were there.


As I did on my other recent layouts, I used Carta Bella's "Summer Splash" collection for the papers and a lot of the embellishments. The background cardstock is from Bazzill, which makes great, sturdy papers for scrapping or cardmaking.

I added the little flowers from Recollections, the tag, sequins from CTMH, and the Nuvo Drops.

Thanks for looking!

Thursday, March 21, 2019

Fin[n]s Up!

Finn's Beach Layout

Finn enjoyed the beach as much or, because he's older, maybe even more than Shae. He was all smiles for his time at the Gulf.


There's a little glare on the photo of the left, but in person this layout looks great. I copied the basic pattern from the book Time to Scrap by Kathy Fesmire. It encourages the creator to use shape to create motion

The yellow background cardstock is from Bazzill. All the other papers and embellishments are from Carta Bella's "Summer Splash" collection, except the strings and the tag base. I also used Nuvo drops along the top edge of the photos for extra detail and texture. Both the tag and the upper beach ball are raised with dimensional adhesive.

(The title of this page "Fin[n]'s Up" is a play on the parrothead  phrase "Fins Up" referring to Jimmy Buffett's song Fins.  Parrothead jokes--only a few would understand, but I couldn't help it.)


Sunday, March 17, 2019

Shae by the Sea

12 x 12 Scrapbook Layout


Sweet Shae loved her first beach trip, even if the waves were a little overwhelming. This layout of Shae at the Gulf Coast is simple, but I wanted to focus mostly on the pictures and her expressions. All the papers are from the line "Summer Splash" by Carta Bella, as well as several of the embellishments including the "Beachy" sign. I absolutely love Summer Splash, and have created several beach layouts using it.

To add a little more interest, I added the white to the background paper to look like waves breaking, using Tim Holtz's Distress Crayon "picket fence."

The starfish is from Jolee's Boutique from my large stash of everything beachy.

I added lines of Nuvo Drop dots above and below the main strip and randomly within the starfish paper print.

I LOVE this picture:

Thanks for stopping by! More beach layouts are on the way......


Saturday, November 4, 2017

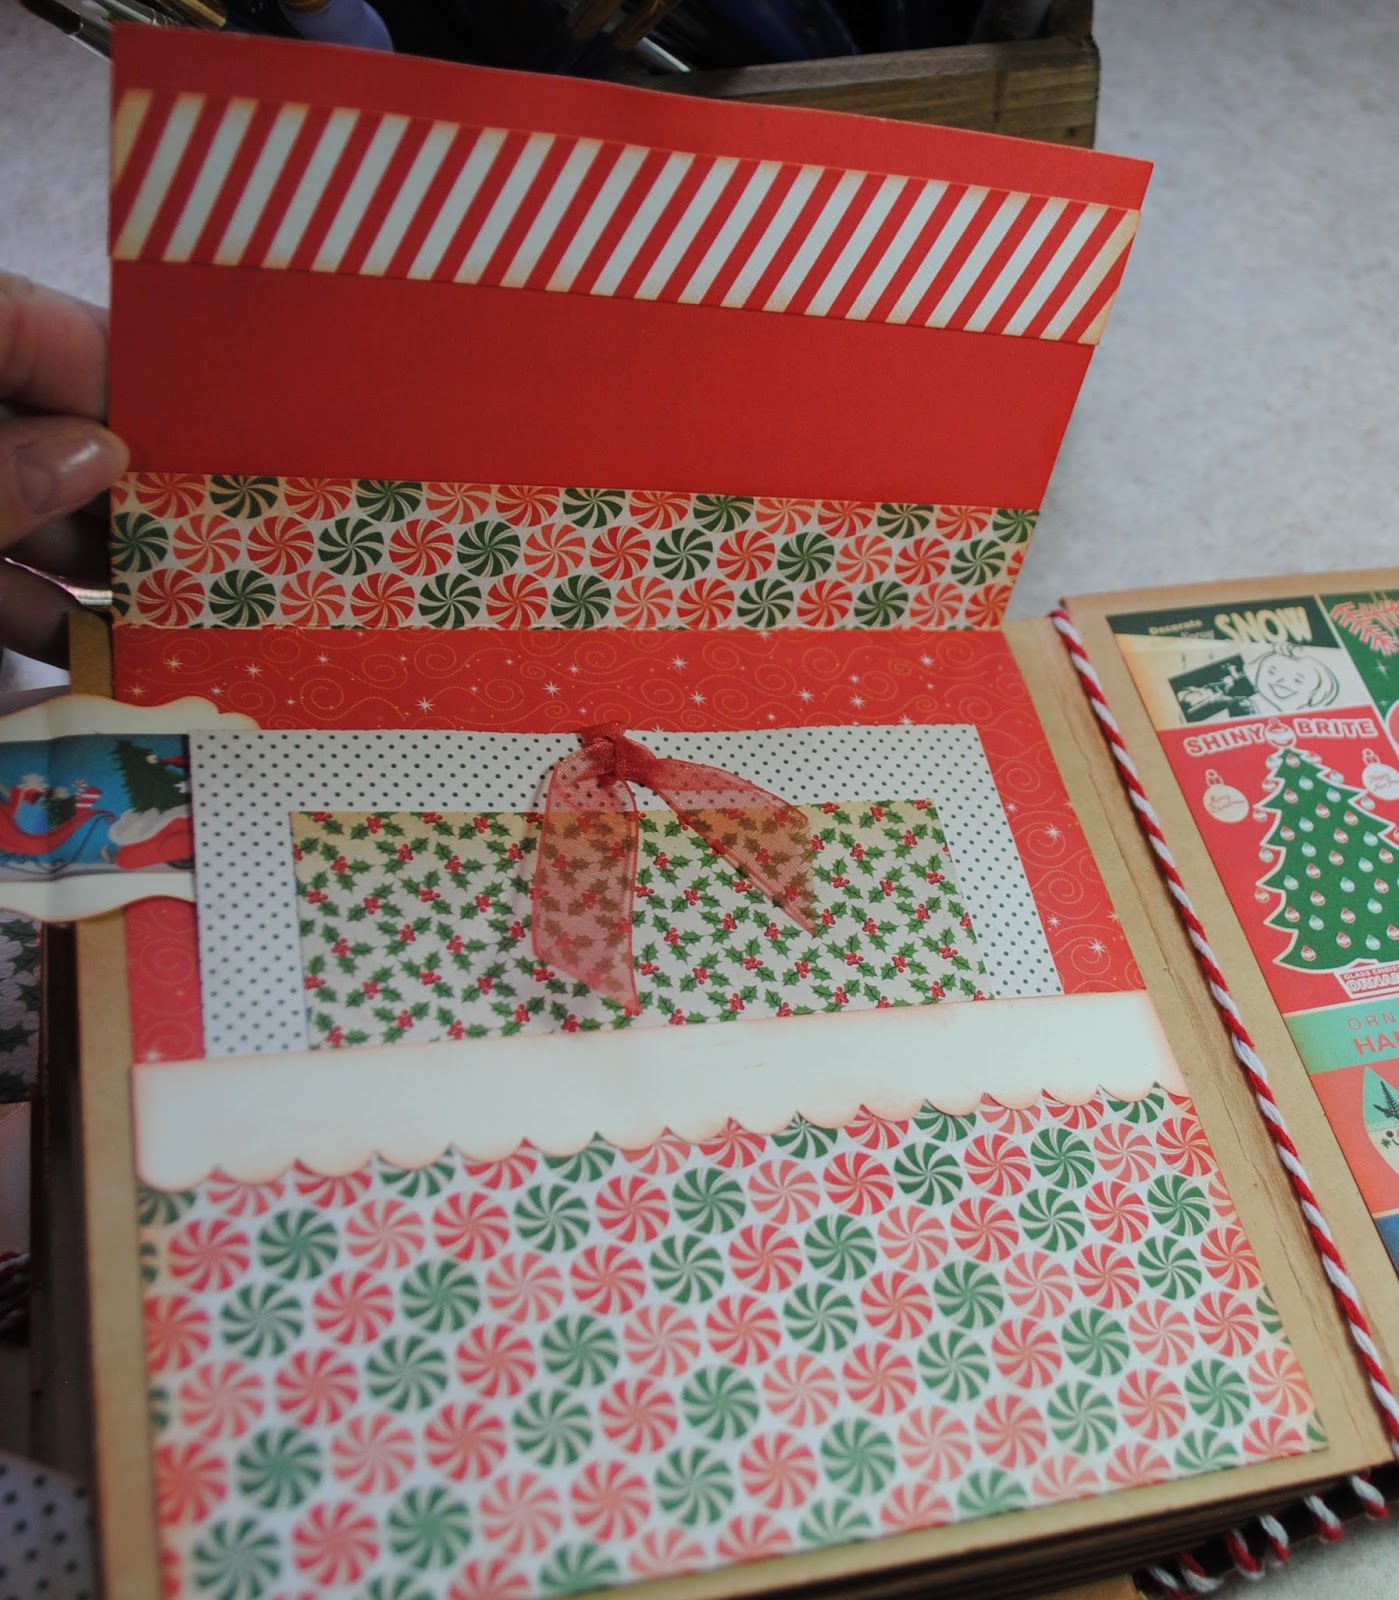
Christmas Mini Album

Carta Bella "A Very Merry Christmas"

The finished album
A few weeks ago I purchased the Carta Bella "A Very Merry Christmas" Collection Kit, 6x6 Paper Pad, and Ephemera Cardstock Pieces:

All together, it probably cost me a little over $25. With it I made a mini album (sold already for $50), 16 cards, and 9 tags! I also have three full pages left that I'm saving for two scrapbook layouts and an advent project. I've also got about a half sheet at least of matching stickers. The lesson here is that you can spend a lot of money on creative supplies, but if you're smart, you can make them go a long way.

This post is going to focus on the mini album, but here's a sneak peak of the cards and tags. I'll do separate posts on those soon.

Getting Started:

Here's how the book looked before I worked on it:


A very sturdy cardboard plain craft-look book. Not including the front and back covers, it contains six pages. I mistakenly threw away the packaging, but the back of the book has an indented watermark that looks like this:
So, it's a Memory Hardware book by Prima, and the size is roughly 6.5 x 7 inches.

I used a bunch of stuff I had on hand. Without going into too much detail, especially because you can find embellishments from your own stash of materials, here are my main "ingredients."

Ink: Wendy Vecchi Tea Rose Archival Ink by Ranger.  Every single page and paper is edged in this pinkish-red ink. I applied it with a Tim Holtz round dauber by Ranger.

 And the rest....

Here's a little more detail on some of the items:
These punches:
Includes punches from Martha Stewart (icicle & evergreen bough), Stampin' Up (scallop edge), Paper Shapers (heart), The Paper Studio (heart), ek success (tag & snowflake). 

These embellishments (some I know are discontinued):
All CTMH--easily substituted with other products or left off entirely.

These Tim Holtz Idea-ology items:
Tinsel & Holiday Flashcards (not the 2017 flashcards)

And these stamps:
Stampers Anonymous (worn grid) Inkadinkadoo (polka dots), Stampabilities (snowflakes), and Our Daily Bread Designs (O Christmas Tree). Any and all of these could also be substituted with other stamps you already own.

Ribbon: I didn't list any of the assorted ribbons and strings I used (aside from the Tim Holtz tinsel) because they were all scraps I had around and any ribbons will do.

Ready to Create:

(This is how my work area looked most of the time. I'm sure it would be more efficient if I worked tidier, but I just don't think that's going to happen.)

The front cover:
The front cover is paper: A back layer(red with snowflakes) and then a smaller layer (ornaments) with the punched scalloped edge attached.
The flower is made from the Tim Holtz die Tattered Flowers. First I stamped cardstock with a music background, then cut the flowers, put them together, and inked the edges. It was too puffy? tall? 3D? at first, so I smashed it down with the palm of my hand. I added the two little mini pieces of paper from the right and top to draw the eye in, and embellished with several red and silver sparkles. I tucked a couple pieces from the evergreen punch under the flower.

The Tim Holtz die:
(one of his best dies ever, in my opinion)

Pages 1 & 2

The first two pages:
Page one has a pocket and tag for either a tiny picture or journaling.

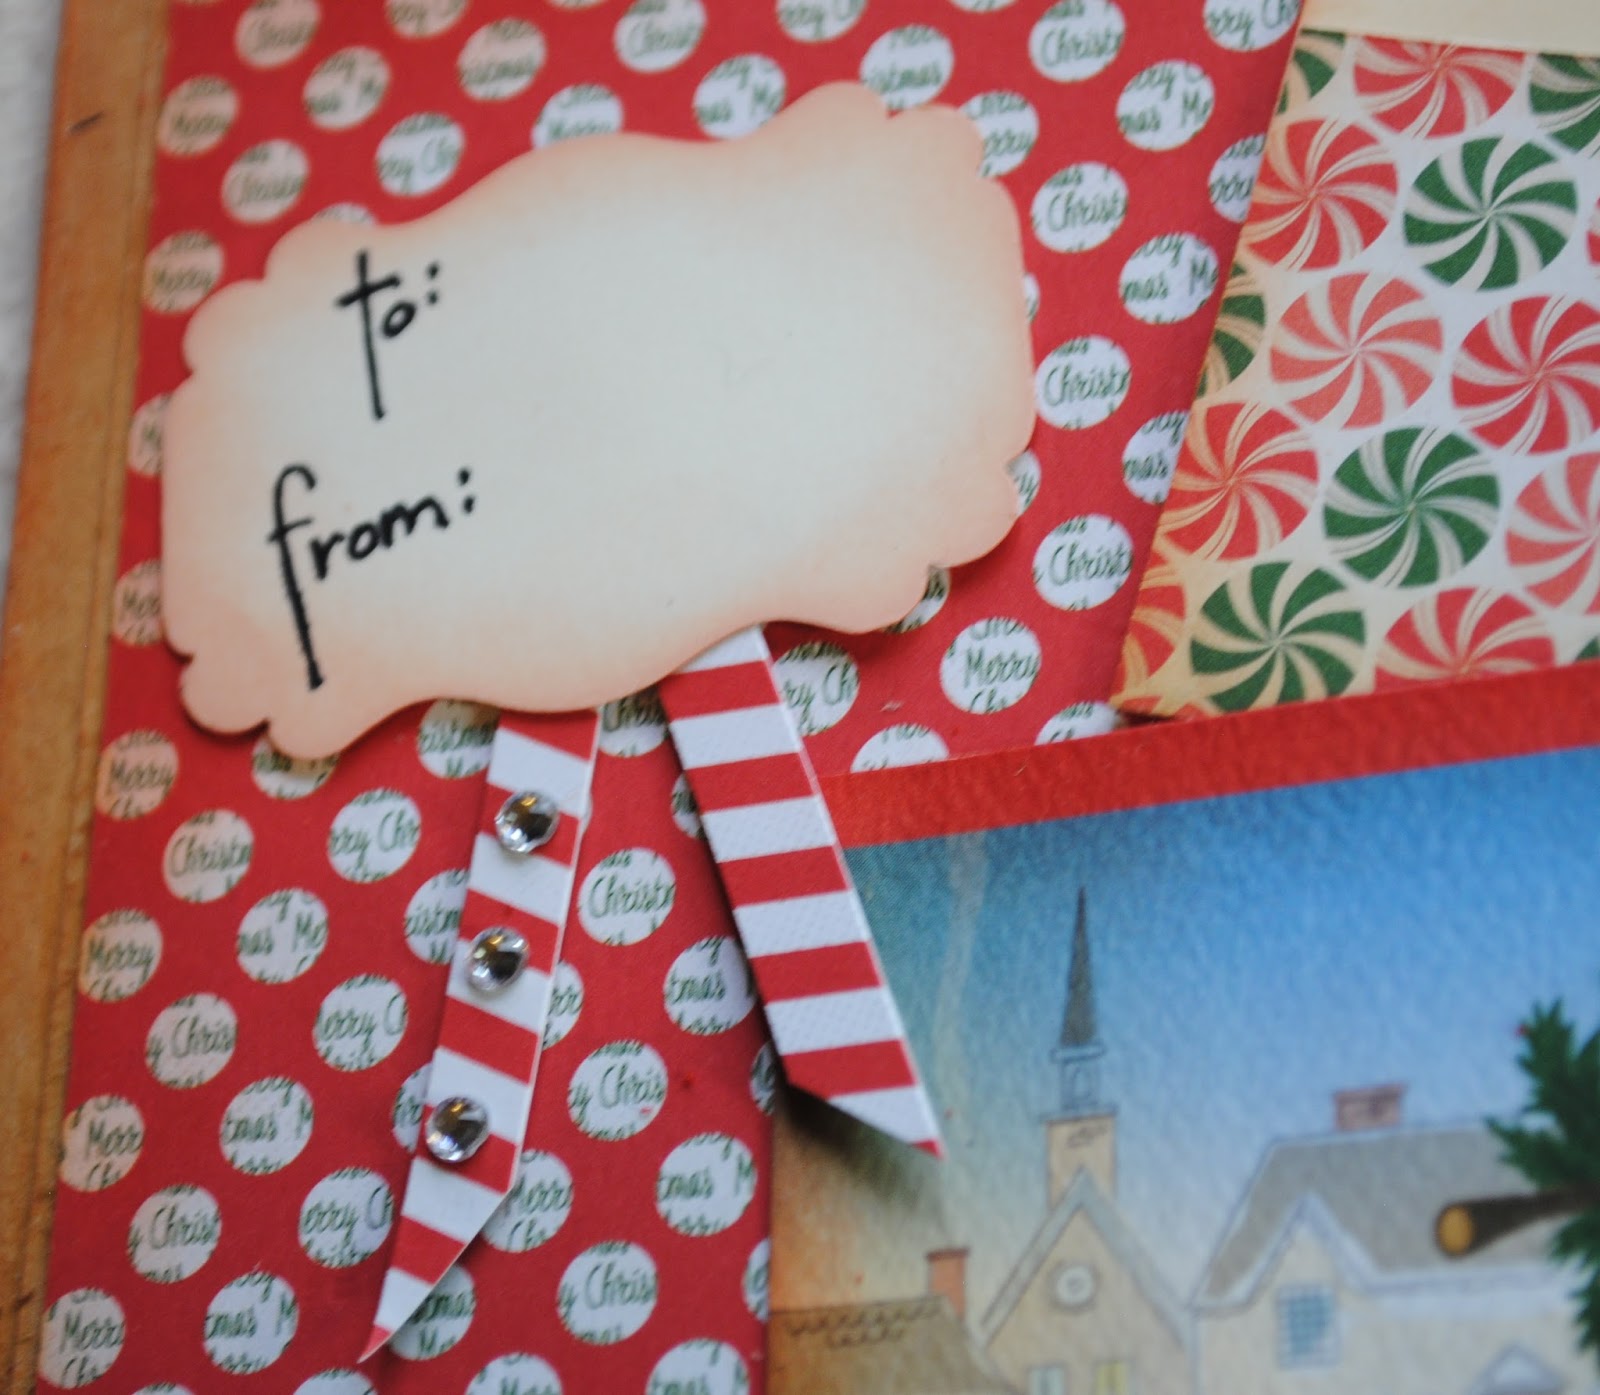
 I included a to/from tag so the album can be given as a gift:

I hand wrote the "to: from:" and added little tails of paper to look like ribbon, along with three sparkles.

The second page is mainly for a photo, so there's lots of empty space. I also loved this paper sheet, and didn't want to mess with it.
But I did stick on some little sequins to give it some dimension.

Pages 3 & 4


Page 3 has a slot left unadhered for a tag on the left side for journaling or small pic. 
When inserted The tag & ribbon also serve as the tab for that page. You can see the tab for the next page on the far bottom right of the picture of the two-page layout. It's simply a folded piece of paper with one of the stickers on it.
 I stuck a CTMH plastic round window disc over the round embellishment on the top left of the page. I'm sure no one still has these old things but me, and this could be left off completely, or you could cover the candles in CTMH Liquid Glass or Ranger's Glossy Accents so get a similar look

The "Joy" tag is stuck on with raised adhesive, and the whole area opens.


Plenty of room inside for a photo on the right, and there's a Santa sticker on the left. I don't usually use/like stickers in my projects. In addition to edging all the papers in ink, I also inked the edges of stickers to tone them down a little so they would look less "sticker-like."

The right side has a pocked and two tabs for journaling & a picture:

Pages 5 & 6


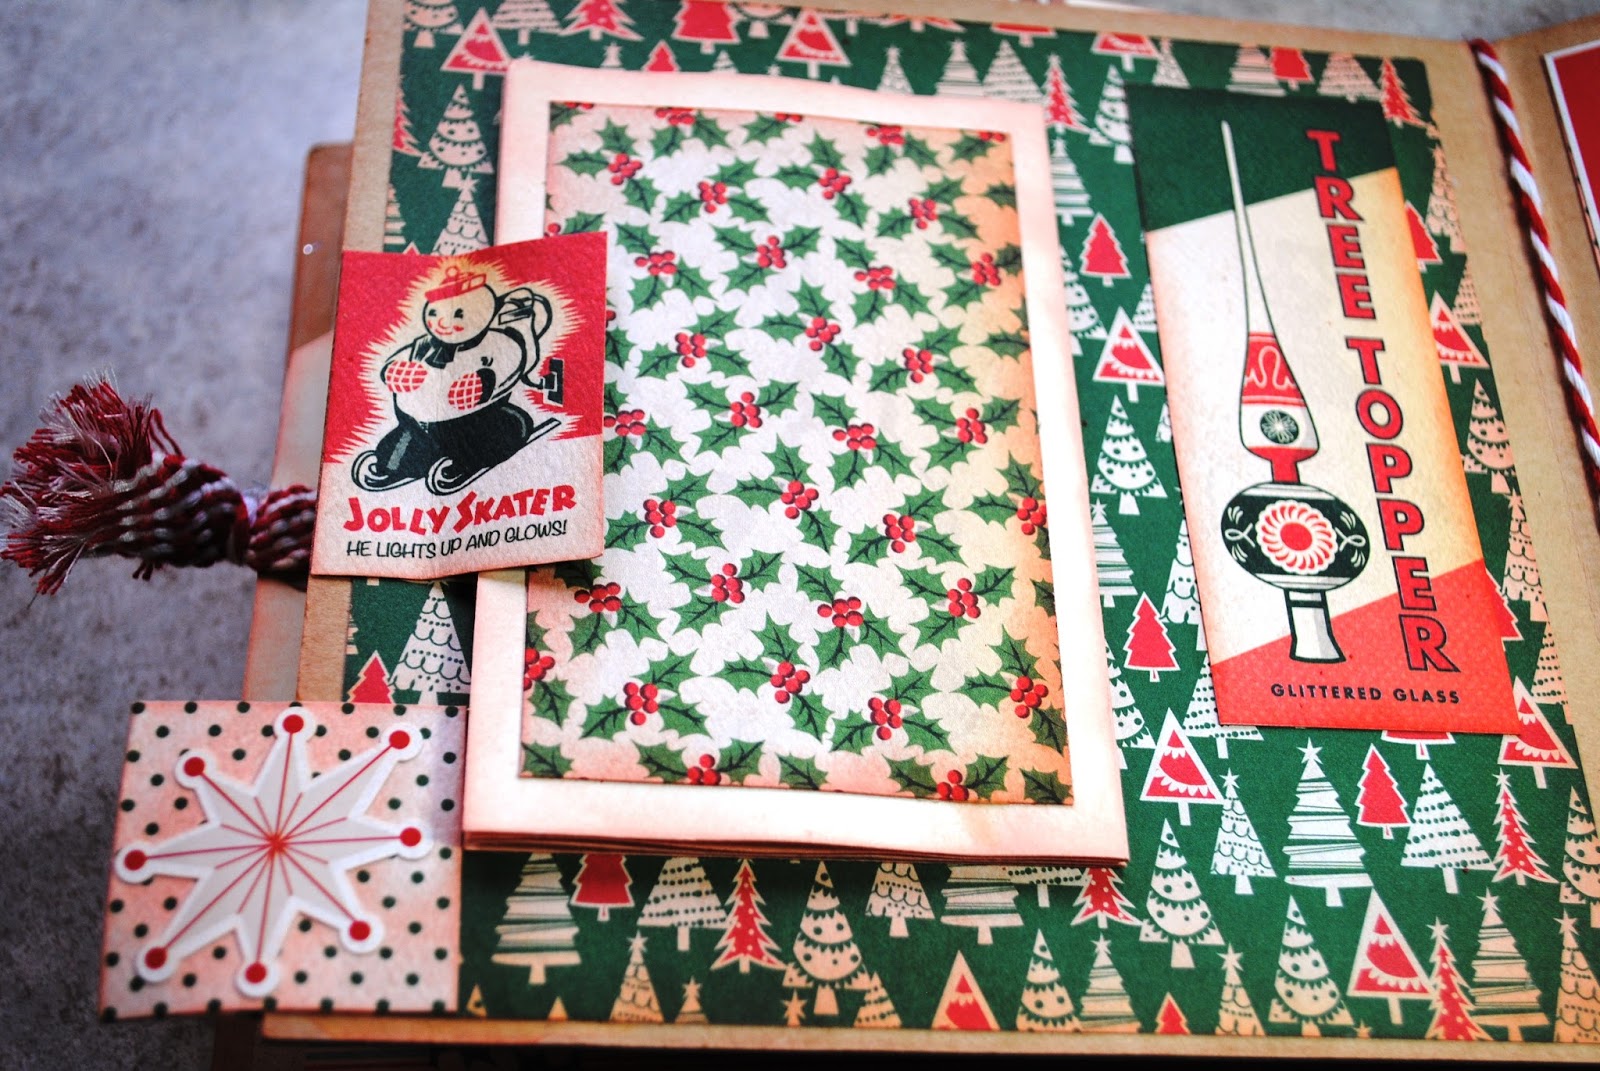
On page 5 you can see the back of the page tab, which has another sticker on it. The little "Jolly Skater" holds back an accordion-folded hidden element.

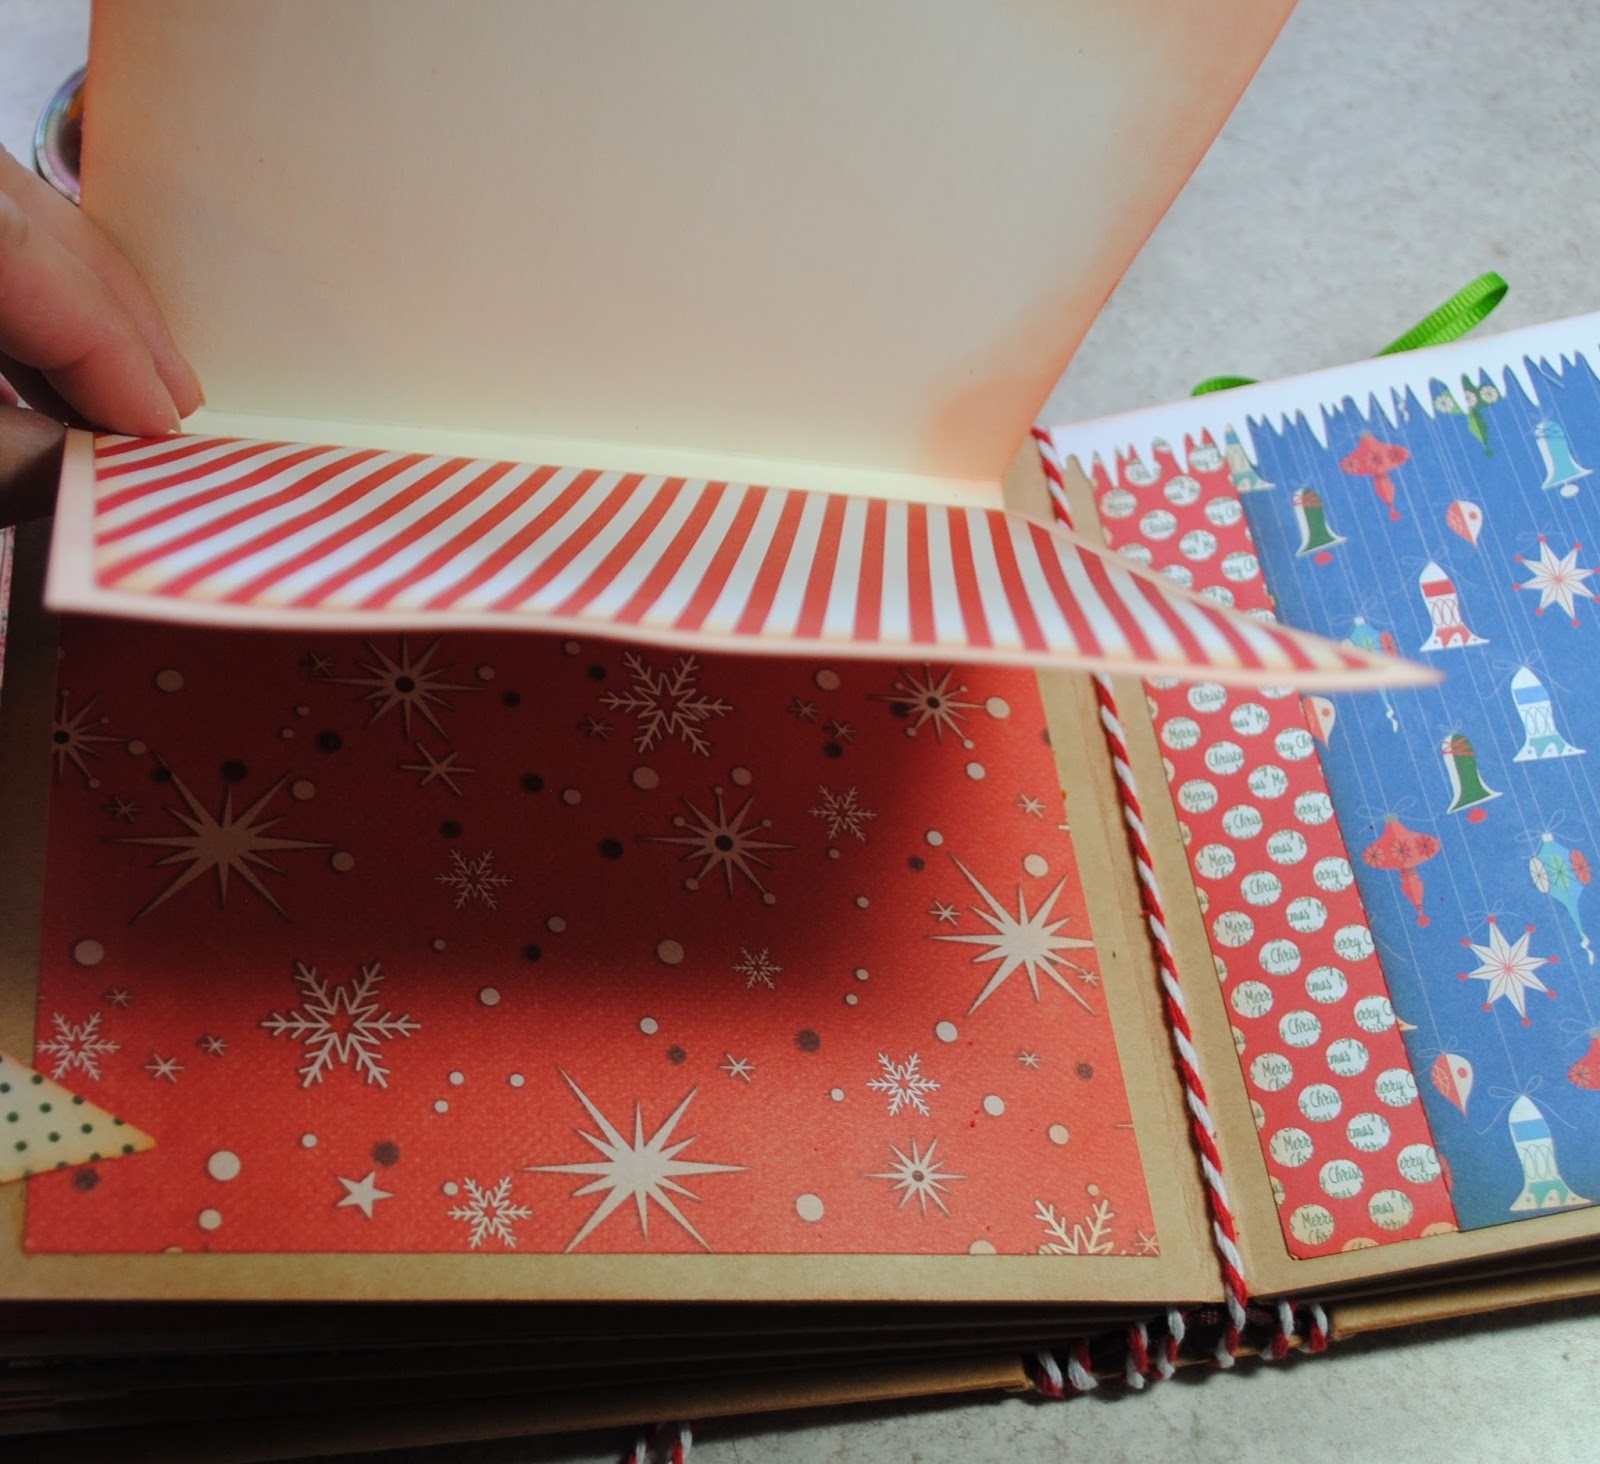
Here's one side of the accordion fold--lots of room for photos or journaling.

And here's the other side with more places to personalize it:

Page 6 has the mistake that bothers me the most:
I forgot to edge with red ink around the "25" banner stickers! I'm sure no one will notice, but it still irritates me every time I look at it. This page also has a mini envelope and tag.

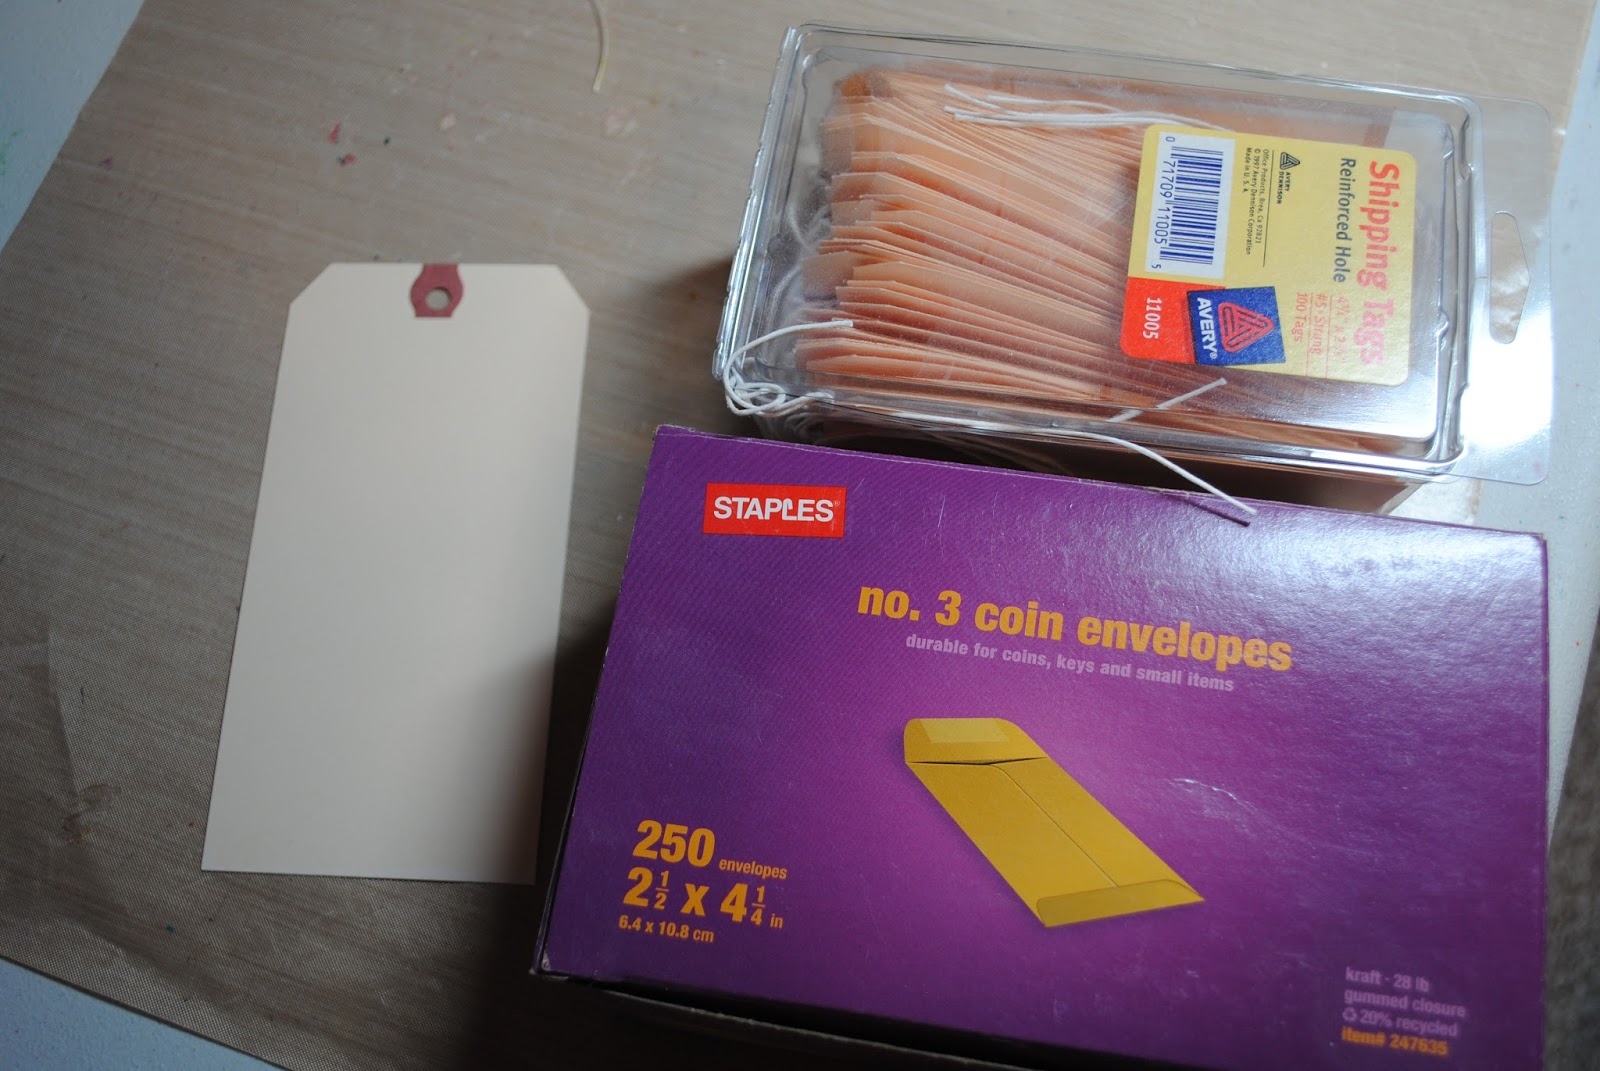
Speaking of tags, I cut some of my own tags and I used some purchased tags:
Did you know that (No. 5) 4 3/4" x 2 3/8" shipping tags fit perfectly into (No. 3) 2 1/2" x 4 1/4" coin envelopes? This makes for a very easy element to add.

Pages 7 & 8

I guess I forgot to take a picture of pages 7 & 8 together--oops!
Lots of tinsel going on page 7.
And the tag has its own tag hanging off the wrapped tinsel.

Page 8 features a lady dancing with Santa and a punched heart page tab wrapped in baker's twine.
The dancing panel is attached with raised adhesive.

You can open up the page to the left:
Revealing a journaling tag on the left and a mat for a pic on the right.

Then the right side opens up to the right: 
Revealing even more places for holiday photos.

This picture is an attempt to show how it opens left and then right.

Pages 9 & 10


Page 9 has a waterfall feature for lots of notes and photos:


(from the side)

To balance with the busy, bulky page 9, page 10 is pretty plain, with only two different papers and an upper border of punched icicles. The page tab is a Tim Holtz Holiday Flash Card. page 11 has a different flash card glued to the back of it.

Pages 11 & 12

 Page 11 has some pretty busy paper as a background, so I didn't want to add much. You can see the reverse side of the page tag--cheer.  And I added some sparkle toward the bottom of the page.

Page 12 has a lot going on:

 The ruffle at the top of the pocket is only paper folded to look like a ruffle with a piece of black ribbon across the top. The candy jar is a sticker.
The flower(?) is a long piece of paper with one edge scallop punched. The paper is accordion folded and then curved around so the ends meet to form a round shape. The snowflake center is a punch, and there's a small sparkle embellishment in the middle.

There's an assortment of hand-cut tags tucked in the pocket. 

Pages 13 & 14

The last two pages of the album:

 Page 13 has a flap that lifts to reveal a tag pocket:

Room for another large photo.

I didn't take a picture of the last page (14) evidently. But you can see from the picture of the two-page layout above, it's only a piece of one of the busiest papers, which can either be left as-is as a final page, or a large mat for a final holiday photo.

Finishing Up:

The back cover has a paper piece with some lines out of Twas the Night Before Christmas:

I used some really thick baker's twine and wrapped a single, long piece around the spine at every page--you can see them it on some of the photos above.

Then I tied all the strands together near the top of the spine, leaving long tails. 

In the pictures above and below, you can see how chunky the album turned out to be. I LOVE a chunky book with bits and pieces sticking out. I like to put the page tabs on just so they'll stick out beyond the pages & cover of the book.


And here's another look at the finished project. You can see I added some red jingle bells to the string tails on the spine.

I received a lot of positive feedback about this book (it sold immediately), and I'm going to try to do some more using the same types of pages. Really, once you make one and figure out the different elements for the pages (pockets, tags, etc.) the following album(s) come together much more quickly.

Thanks for reading this LONG post. If I've left off any important instructions, please ask me to elaborate in the comments. I hope you make your own Christmas mini album to help hold all your holiday memories!